Showing posts with label Sewing and Crafts. Show all posts

Monday, October 14, 2013

Yo-Yo's and Pearls

The first time I made a yo-yo, I was hooked.  They are such fun to make and add texture and flare to bags, clothing, placemats, bedding, and anything else you want to put them on:  book covers, electronic covers, head bands,... the possibilities are limitless.  Most of the time they are made from cotton fabrics, but I've had it in my mind to make this for a long time. 


This is made from a heavy cotton fabric.  Since most yo-yo's are made in colors, I thought it would be fun to use a solid and make them look dressy.  Thicker fabric makes a larger hole in the center of each one.  My intention was to find black faceted beads to put in the center.  I looked several places and struck out.  That's when I saw these big pearls.

So the lowly yo-yo that came about as a way to use every scrap of fabric during hard times, turned into a very elegant evening bag, loaded with texture and style.

What do you think?  The zipper pull has a black cord and a big pearl dangling off it.

Saturday, June 1, 2013

Chenille Bunny


When I saw this chenille bunny pattern at www.sew4home.com, I had to make it for my granddaughter.  It has a vintage feel with the chenille and cotton print combination.

I went to the local JoAnn's to look for cotton chenille, but they said they didn't have any and didn't know where to get it.  Their shelves were full of polyester chenille, but personally, I can't stand the feel of it.  Cotton chenille, on the other hand, brings back the pink chenille bedspread I had and loved as a child.  I'm a big fan of cotton and soft comfy things.  After searching the internet, I found chenille at Chenille Magic. (www.chenillemagic.com)  I ordered a soft lavender chenille and it came way before I expected it and was a very good quality fabric.  I'll order from them again the next time I sew with chenille.

If you love to sew and haven't been to the Sew4Home site, check it out.  It's cram-packed with fun things to make for the home, clothing, toys, and just about anything else you can think of.  The patterns are free and print out full size for the ones I've used.
The pattern had adorable black button eyes sewn on with "X's", but my granddaughter just turned four months old and I was concerned about the buttons falling off and becoming a choking hazard, so I cut pieces of black felt and sewed them on.  Then I put a white French knot on each one so the eyes didn't look dead.  Finally, I added eye lashes.
 
The sweet nose and mouth are a big pink "X" stitched on with the top part filled in.
The tail is a big variegated yarn pom-pom.

 
This sweet little bunny is all texture and softness and cuddly and easy to hold with floppy ears, arms, and legs.  I hope she likes it.

Saturday, May 11, 2013

Fashion and the Movies

Last night I went with a friend to see The Great Gatsby. 
 
The scenery was exquisite, the costumes were incredible and Leonardo Di Caprio gets better and better as time goes by.  I found myself wishing I could rewind and slow it down to take in all the details of everything, especially the clothing, makeup, and jewelry.
 
Gatsby's house was unimaginable for most of us.  I found the little cottage out back where Toby Maguire lived to be much more appealing.
 
But I want to talk about the fashions.  I've always loved the Art Deco age.  The clothing has very simple lines, but made with exquisite fabric or lavishly embellished.  The dress in the photo above had an overlay of clear beads.  These weren't tiny bugle beads, but grape sized baubles that really caught the light.  I am sure it must have felt like sitting on rocks when Daisy sat down.  Maybe she stood for this entire scene.
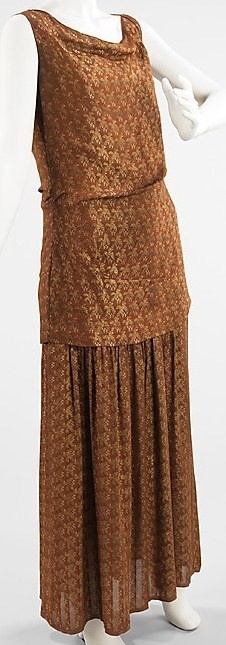
Here's the perfect example of a simple slip dress with embellishments either beaded, painted, or printed on the dress.  There seems to be a cape attached at the shoulders and head dressing was popular to embellish the simple hair styles of the time.
 
Another example from Pinterest of a simple dress made in a lush fabric.
 
 
Sheer fabrics in layers were seen in many of the scenes of the movie, like this gorgeous aqua number, but it is still a simple column of gorgeous fabric. 
I have searched and searched for a good shot of this robe that Daisy wore.  It was lined in white satin and had white applique across the back and on the sleeves - my favorite costume and one I would love to copy.
 
I thoroughly enjoyed the movie and all it had to offer, in spite of the tragic nature of the story.  If these styles appeal to you, they would be very simple to sew up and take very little time to make.

Monday, January 14, 2013

The Almost Lost Art of Tatting

When I was about eight years old, my grandmother tried to teach me how to tat.  She made beautiful tatted lace that she used to edge fine linen handkerchiefs.  I wish I'd had the opportunity to learn from her when I was older. 
My hand coordination at eight wasn't developed enough to master tatting.  It's amazing that a tiny metal shuttle can create such beautiful delicate lace, especially since the art originated with fishermen who wove fishing nets with a series of knots.

Knitting has seen a huge resurgence in popularity in recent years, and I hope this beautiful art will resurrect itself as well.  It would be a shame for it to die out. 

Do any of you know how to tat? ********** P.S. I had a comment from Jon at www.tatsaway.blogspot.com. His blog Tat-a-Renda is all about tatting. I am pleased to know that there are still tatters out there. Check out his blog for directions and many examples of fine work.

Tuesday, December 25, 2012

Retro Style

Take a look at the Spring 2013 Butterick pattern catalog.  I love this retro look.  These days most pattern makers have a section for Retro or Vintage patterns of the decades from the 20th century.

Along with fashions from the 1920's and 1930's, automobiles are going backwards in shapes and shades of decades past.

The red cloche and red clutch bag adds color to her neutral outfit and cloche hats are all the rage these days.

Tuesday, November 27, 2012

Bias Cut


Ever wonder how the actresses in those movies from the 1930's looked so great?  You know the ones I mean: they changed into evening wear for dinner.  It is doubtful that most people wore evening clothes for dinner, but it was fun to watch and imagine yourself in a beautiful home in beautiful clothing, especially when the country was struggling so hard to just survive.

These gowns were frequently cut on the bias.  That means they were cut diagonally instead of on the grain of the fabric.  What difference does that make?  A bias cut garment hugs the figure and stretches over curves.  The weight of diagonally cut charmeuse hangs and drapes, accentuating curves and moving with the body.

Give this a try for an evening gown or even a night gown.  You'll like the effect.

Wednesday, October 24, 2012

Addictive Yo-Yo's

These little puffy circles are called yo-yo's. To the best of my knowledge, and research, they originated in the 1930's. During the depression, every scrap of fabric was used for something. They can be connected together to make placemats, pillow covers, and even whole quilts. Sometimes they are strung together to make dolls and used as embellishment on everything from purses, hats, gloves, and clothing to just about anything you can stick them on. Once you start making them, they are addictive.

To make a yo-yo, cut a circle twice the width you want your finished piece to be, plus 1/4 inch for hemming. Trace around a glass or whatever you are using to make your circle on the back side of the fabric so your line won't show. Example: If you want a two inch yo-yo, as you see on this t-shirt, cut circles that are 4 1/4" wide. Turn under 1/4" and hand stitch with a running stitch around the circle to hold it down. When you get all the way around, pull the thread tight. The fabric will gather into a small circle. Tie your thread and flatten the fabric into a gathered circle. You can leave them as is or sew them down with a button in the center for added effect.

Be forewarned: Once you start Yo-Yoing, it's hard to stop!


Search This Blog